Setting Up Your Own Self-Hosted NAS: A Practical Blueprint
I built my first self-hosted NAS because I wanted control over my data and a reliable place for backups. I care about encryption, automation and keeping things low-drama. This guide gives a compact, hands-on route from pick-a-box to plug-and-play automation. Expect concrete examples, config pointers and the trade-offs I chose.
Introduction to Self-Hosted NAS
The rise of self-hosted solutions
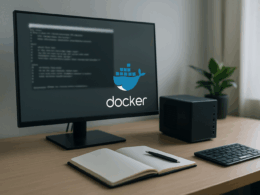
Home and small-scale self-hosted setups are no longer hobbyist toys. Affordable low-power hardware, mature container tooling and software like Docker and Proxmox let a single machine run file services, apps and automation reliably. Running your own Self-Hosted NAS means you own the stack. You also accept responsibility for maintenance and backups.
Importance of data privacy
If you value privacy, a Self-Hosted NAS puts the data under your control. I run encrypted datasets for sensitive folders and keep critical backups offline. Encrypt-at-rest and encrypted replication reduce risk if a drive leaves the house or an attacker gains network access. Don’t confuse “self-hosted” with “secure by default”. Hardware and configuration choices determine exposure.
Overview of NAS configuration
A practical NAS mixes three layers: hardware, storage layout and services. Hardware gives persistence and performance. Storage layout defines redundancy and rebuild time. Services are SMB/NFS for file shares, a web UI for management, and optional apps like Nextcloud or Plex. Automation sits across these layers: monitoring, snapshot rotation and automated replication.
Practical Steps for Automation
Choosing the right hardware
Pick a chassis that fits your needs, not the fanciest spec sheet. For most people a modest quad-core CPU, 8–16 GB RAM and four hot-swap bays is sensible. Choose enterprise-grade drives for durability if you depend on them daily; for bulk media a mix of NAS-grade drives and a low-power cache drive works well. I prefer ECC RAM for long-term reliability when running ZFS. If budget is tight, a single-board computer with external drives can work for file sync and lightweight apps, but avoid that for primary storage.
Concrete example: an ASRock J5040 mini-ITX board, 16 GB ECC, four 8 TB NAS drives in RAID-Z1 or RAID-Z2 is a realistic mid-range build. It keeps power use modest and gives reasonable rebuild times.
Software options for automation
Bespoke choices are common. I favour ZFS for storage because snapshots, checksums and send/receive replication make automation simple and robust. For orchestration, use systemd timers or a container orchestrator like Docker Compose. Combine ZFS snapshots with periodic zfs send to a remote host for automated replication.
Example toolchain:
- ZFS for filesystem and snapshots.
- Samba for SMB shares and NFS for Unix clients.
- Docker Compose for apps like Nextcloud, Syncthing or Photo managers.
- Prometheus + Grafana, or a simpler pushgateway + alerting script for monitoring.
- rsync/zfs send for backups and replication.
Setting up your NAS for success
Make automation bite-sized. Create snapshot schedules, retention policies and replication rules from day one.
Practical steps I use:
- Create a ZFS pool with a clear dataset hierarchy: data/home, data/backups, apps. Keep metadata-heavy services on separate datasets.
- Configure snapshot cadence: hourly for active data, daily for user files, weekly for long-term. Use simple naming like hourly-YYYYMMDD-HHMM.
- Automate snapshot pruning. A single script can remove snapshots older than defined retention rules. Run it with systemd timers or cron.
- Automate replication with halted windows to avoid peak-hour strain. For example, zfs send | ssh to a remote host every night. Use incremental sends to minimise bandwidth.
- Use declarative app deployment. Docker Compose files live in a git repo. I tag versions and deploy with a short script so rollback is one command.
Verification: test restores weekly. I restore a few random files from snapshots and test booting a container from the replicated host. Automation without periodic tests is just an illusion.
Common pitfalls to avoid
Overcomplicating early is the fastest route to failure. I see three repeated mistakes.
- Bad backups: relying on a single off-site sync without versioned snapshots. Replication should store history.
- Ignoring rebuild times: mixing very large drives with a single parity vdev leads to long rebuilds and higher failure risk. Plan vdevs for rebuild time and fault tolerance.
- Blind automation: cron jobs that fail silently. Always log to a central place and set simple alerts on failures. A one-line email or Telegram alert on zfs send failure saves hours later.
Concrete example: a four-drive RAID-Z1 with 16 TB spindles can take days to resilver. If a second drive fails during that window, data loss follows. I prefer RAID-Z2 or two mirrored vdevs for large spindles.
Future-proofing your setup
Plan for growth and change. Use standard interfaces and avoid vendor lock-in. ZFS datasets and Docker Compose are portable. Keep enough spare SATA ports or add a HBA card now, not later. Document the network layout, NAS configuration and recovery steps in plaintext in a repository. That file will be invaluable when you tire of remembering details.
Hardware tip: separate the boot device from the storage pool. Use a small mirrored SSD for the OS and keep the data pool on separate drives. That makes OS reinstall or migration simpler.
Community resources and support
Community knowledge is where practical problems get fixed. Subreddits, forum threads and project docs cover compatibility quirks and sample configs. I read project release notes and migration guides before upgrading ZFS or Docker versions. If you participate, share your exact hardware and config snippets. Real examples save time.
Concrete starting points:
- Project docs for ZFS, Samba and Nextcloud.
- Git repos with example Docker Compose files for common self-hosted apps.
- Active forum posts that match your hardware for firmware quirks and HBA compatibility.
Final takeaways
A Self-Hosted NAS is a long-term tool, not a weekend toy. Prioritise simple, testable automation: snapshots, retention, replication and alerts. Pick hardware that balances rebuild time and cost. Keep configs declarative and document recovery steps. Do the restore tests. If you build with those disciplines, the NAS will serve reliably and give you the privacy and flexibility that made you set it up in the first place.