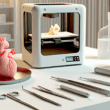
3D printing has completely changed how we approach DIY projects, making it possible to produce bespoke prototypes right from our own homes. Whether you’re tinkering with gadgets in your garage or crafting a unique gift for a friend, this technology empowers you to go from concept to tangible object in a fraction of the time. In this blog post, we’ll delve into the essentials of 3D printing for DIY, explore its benefits, walk through the steps to create your first prototype, discuss how to gather feedback and iterate, and consider what lies ahead for this exciting field.
Understanding 3D Printing Technology
3D printing, often dubbed “additive manufacturing,” builds objects layer by layer, enabling shapes and geometries that would be near impossible with traditional methods. But how exactly does it work, and what should you know before diving in?
1. Origins and Evolution
Although its roots trace back to the 1980s—when industries like automotive and aerospace used it for rapid prototyping—3D printing is now far more accessible. Initially, the machines were costly and confined to professional environments. Today, hobbyist-friendly options are affordable, compact and surprisingly user-friendly.
2. Main Printing Methods
-
Fused Deposition Modelling (FDM): Perhaps the most familiar technique to DIYers, FDM printers extrude molten thermoplastic through a heated nozzle, depositing it layer by layer. They’re popular because they’re relatively inexpensive, straightforward to operate and can print in materials such as PLA, ABS or PETG.
-
Stereolithography (SLA): This method uses a laser to cure liquid resin into solid layers. If you’re after fine detail and smooth surfaces—think jewellery components or dental models—SLA is ideal. The trade-off is that resin can be messier and often more expensive than filament.
-
Selective Laser Sintering (SLS): SLS fuses powdered material (plastics, metals or ceramics) with a laser. While industrial-grade SLS machines are costly, some entry-level units are trickling into enthusiast markets. SLS delivers robust, functional parts without requiring support structures, but the setup and post-processing can be more involved.
3. Materials and Their Properties
Understanding filament and resin characteristics is crucial:
-
PLA (Polylactic Acid): Biodegradable, low-warp and beginner-friendly. Ideal for most aesthetic prototypes or low-stress applications.
-
ABS (Acrylonitrile Butadiene Styrene): More heat-resistant and tougher than PLA, but more prone to warping. Often used for functional parts that need sturdiness.
-
PETG (Polyethylene Terephthalate Glycol): A mid-way between PLA and ABS—reasonably easy to print, durable, and with some flexibility.
-
Nylon: Strong, wear-resistant and slightly flexible, which is excellent for gears or components under load. However, it tends to absorb moisture, so proper storage is essential.
-
Resins for SLA: There are standard, tough, flexible and even dental-grade resins. They yield crisp details but usually require isopropyl alcohol for cleaning and UV curing.
-
Advanced Composites: Carbon-fibre-reinforced, metal-filled or wood-filled filaments are emerging, letting you mimic various textures and mechanical properties.
4. Why Layer-by-Layer Matters
Because 3D printers build in very thin slices (0.1–0.3 mm on average), you can realise overhangs, internal cavities and complex lattice work without the need for custom tooling. For DIYers, this means you can prototype hinge mechanisms, interlocking parts or even decorative patterns that would be prohibitively difficult by hand.
5. Practical Tips before You Begin
-
Printer Calibration: Always level your bed and calibrate your extrusion rate. A poorly levelled bed causes adhesion issues, leading to prints that warp or fail.
-
Environmental Control: Particularly with ABS or nylon, an enclosure helps maintain stable temperatures, reducing warping.
-
Software Familiarity: Get comfortable with slicing software—Cura, PrusaSlicer or similar. They’ll translate your 3D model (usually in STL format) into G-code instructions for the printer. Learning to tweak print speed, temperature and layer height will dramatically influence your print quality.
By appreciating these fundamentals—methods, materials and practical considerations—you’ll be well equipped to harness 3D printing for your next DIY adventure.
The Benefits of Prototyping for DIYers
Why bother prototyping? Why not just jump straight to crafting the final piece? Here are the advantages once you start embracing 3D-printed prototypes:
1. Unleashing Creativity Without Restraint
With skilled hands and a hacksaw, you can achieve impressive results—but you’re still limited by physical tools. 3D printing liberates you to experiment freely.
Imagine you’re designing a bespoke drone frame. You can quickly print several iterations, adjusting arm lengths, motor mounts or battery compartments, until the balance and aerodynamics feel just right.
Because prototypes are relatively inexpensive (in terms of wasted filament), you can explore radical new concepts—such as organic, biomimetic shapes—without fear of “wasting” materials.
2. Reducing Material Waste
Traditional workshops frequently involve chiselling away material, leading to offcuts and scrap. Conversely, 3D printing only uses precisely the filament or resin required. Even if your design needs supports, you can often recycle or reuse these in subsequent prints. For those mindful of sustainability, this “additive” approach is a big win.
3. Accelerating the Design Cycle
Handcrafting multiple versions of a component can take days or weeks. With a 3D printer, you’re looking at hours—or even minutes—for small parts. This rapid feedback loop enables you to test, refine and finalise your design far more quickly, which is particularly valuable if you have limited free time.
4. Cost-Effectiveness
Once you’ve invested in a decent printer and materials, printing prototypes costs pennies per part. Compare that to ordering custom parts from a machine shop or purchasing multiple off-the-shelf components that might not fit perfectly—3D printing often ends up cheaper, particularly for small runs or one-offs.
5. Real-World Examples and Inspiration
-
Custom Bicycle Accessories: An enthusiast designed and printed a unique attachment to hold a water bottle and smartphone together, streamlining access during rides. Instead of cumbersome universal mounts that never quite fit, the 3D-printed prototype sat perfectly on the bike’s frame.
-
Home Automation Fixtures: Someone wanted light switch covers with built-in ambient sensors. By prototyping multiple versions, they fine-tuned the angle and recess depth to read light levels accurately, avoiding false readings.
-
Educational Tools: Teachers are now creating tactile teaching aids—like anatomical models or geometric solids—allowing students to handle and explore concepts physically, bringing lessons to life without purchasing costly pre-made kits.
Prototyping doesn’t just help you “get it right”; it encourages iterative innovation. You might start with a simple concept, only to discover through testing that a radical redesign is necessary. In the world of DIY, that’s where the magic happens: when your project evolves beyond your original imagination.
Steps to Create Your First Prototype
Ready to make your inaugural 3D-printed prototype? Here’s a detailed roadmap to guide you, with practical hints along the way.
-
Ideation and Conceptualisation
-
Sit down with a notebook, sketchpad or digital tablet and brainstorm ideas. Consider a problem you’d like to solve—maybe a kitchen gadget that clamps jars more securely, or a bespoke holder for your favourite gardening tools.
-
Ask yourself: Who is using this? What environment will it be in? Those questions will guide material choices and design constraints.
-
Sketch multiple concepts. Even if you’re not an artist, rough outlines help you visualise proportions, hinge points or assembly schemes. Bounce ideas off friends or online forums; sometimes a fresh perspective highlights an overlooked detail.
-
-
Drafting CAD Models
-
Choose a CAD tool that suits your skill level. Beginners often start with Tinkercad (browser-based and intuitive), while intermediate users favour Fusion 360 (free for personal use in the UK) for its parametric design capabilities and robust feature set.
-
Begin by modelling basic shapes—cubes, cylinders and spheres—and gradually cut, extrude or fillet to build complexity. Keep the following in mind:
-
Dimensions and Tolerances: If parts must fit together (e.g. a peg into a hole), allow for a clearance of 0.2–0.3mm on each side for FDM prints. For resin prints, tolerances might be even smaller, but check your printer’s specifics.
-
Wall Thickness: Ensure structural integrity by keeping walls at least 1.5–2mm thick in FDM prints. Thinner walls can be fragile or not print at all.
-
Overhang Angles: Designs with overhang angles steeper than 45° often need support structures. If you want to avoid supports, add chamfers or break designs into multiple parts that snap or glue together later.
-
-
Label components clearly and organise your CAD workspace. If you’re designing a multi-piece assembly, consider maintaining separate files or assemblies.
-
-
Choosing Printing Materials
-
PLA: If you’re printing a decorative item or a proof-of-concept model, PLA suffices. It doesn’t require an enclosed printer and adheres well to most print beds.
-
ABS: Suited for outdoor use (e.g. garden fixtures) or components that might heat up (near a radiator or under sunlight). Use an enclosure to reduce warping. Remember: ABS emits fumes, so ensure good ventilation.
-
PETG: A great general-purpose material—stronger than PLA, less prone to warping than ABS. If you need slight flexibility (such as clips or hinges), PETG is worth exploring.
-
Specialty Filaments: If your project demands extra rigidity or aesthetic appeal, try carbon-fibre or wood-filled filaments. Keep in mind that abrasive filaments often require a hardened steel nozzle.
-
-
Preparing the Model for Printing
-
Export your CAD design as an .STL or .OBJ file.
-
Open it in slicing software (e.g. Cura, PrusaSlicer). Familiarise yourself with these key settings:
-
Layer Height: 0.1–0.2mm is typical. Lower layer heights give finer detail but increase print time.
-
Infill Density and Pattern: For a purely visual prototype, 10–15% infill (e.g. grid or triangles) suffices. For functional parts under stress, consider 30–50% infill or use denser patterns (cubic, gyroid).
-
Print Speed: 40–60 mm/s is a good starting point for PLA. Slower speeds (20–30 mm/s) can improve surface quality but extend print time.
-
Supports: Enable if required, but position them strategically to minimise post-processing. Some software offers “tree supports” to reduce scarring on overhangs.
-
Bed Adhesion: Use a brim or raft if warping is likely. A glue stick or blue tape on the bed helps PLA stick; for ABS, a PEI-coated bed or a slurry of ABS dissolved in acetone works wonders.
-
-
-
Printing and Troubleshooting
-
First Layer Check: The initial layer is critical. Ensure it’s neither too close (which can cause nozzle clogging) nor too far (which results in poor adhesion). Listen for that gentle “scraping” sound of the nozzle.
-
Monitoring: Stay nearby for the first 10–15 minutes. If you spot warping or stringing, you can pause and adjust temperature or disable supports.
-
Common Issues & Fixes:
-
Warping: Lower bed temperature slightly or increase first-layer height. Use an enclosure for ABS.
-
Layer Shifts: Check that belts are tight and that the printer is on a stable surface—vibrations can nudge the print head.
-
Under-Extrusion: Ensure your filament spool spins freely and that the extruder gear is clean. A clogged nozzle might need a cold pull or replacement.
-
Over-Extrusion: Reduce the extrusion multiplier (e.g. from 100% down to 98%) in the slicer.
-
-
-
Post-Processing
-
Support Removal: Use flush cutters, pliers or a craft knife. Be gentle to avoid snapping fragile details.
-
Sanding and Filling: For FDM prints, sand in stages—start with 200-grit sandpaper, move to 400-grit, then 600-grit for a smooth finish. Fill gaps or layer lines with a light application of automotive filler (e.g. Bondo) if you need a perfectly smooth surface.
-
Priming and Painting: If you want a polished look, prime your print with a plastic-specific primer, sand lightly after drying, then apply spray paint or acrylics.
-
UV Curing for Resin: If you’ve used an SLA printer, rinse off excess resin with isopropyl alcohol, blot gently with paper towels, and then cure under a UV lamp or natural sunlight for at least 10–15 minutes on each side.
-
Approaching your first prototype methodically—ideation, CAD modelling, material selection, slicing, printing and post-processing—will set you up for success. And remember: each “failed” print teaches something valuable, so don’t be discouraged if you need several attempts before nailing the perfect prototype.
Future of 3D Printing in DIY Projects
What does the horizon hold? As 3D printing technology matures, DIY enthusiasts stand to benefit from several exciting trends and innovations.
1. Expanded Material Ecosystem
-
Biodegradable and Recyclable Filaments: Expect to see more filaments derived from algae, hemp or reclaimed plastics. Not only will this lessen environmental impact, but it’ll also reduce material costs over time.
-
Hybrid Composites: Materials combining wood fibres, metal powders or carbon fibres will become more commonplace. Imagine printing a drone frame that’s both lightweight and extremely stiff, or crafting a lamp shade that looks and feels like real wood.
2. Multi-Material and Colour Printing
-
Single-Print Assemblies: Printers capable of extruding two or more filaments simultaneously (e.g. TPU for flexible joints and PLA for rigid sections) are becoming more affordable. You could print a living-hinge mechanism—one rigid side, one flexible side—without any post-assembly.
-
Full-Colour Prototypes: Although still pricey, full-colour additive processes (like inkjet binding or PolyJet) let you prototype models in lifelike hues. Perfect for scale models, cosplay props or immersive educational tools.
3. AI-Assisted Design and Slicing
-
Generative Design: AI tools—some integrated into CAD packages—can suggest optimised geometries based on strength-to-weight ratios, material constraints or aesthetic rules. You simply define the load points, attachment locations and material, and the software generates an organic, lattice-like structure that’s both lightweight and strong.
-
Smart Slicing: Future slicers may automatically adjust layer thickness mid-print—thicker layers where detail isn’t needed, finer layers for intricate sections—to balance speed and quality. AI could also predict and preemptively correct potential failures (like bridging sag or impending warping).
4. Desktop Metal and Resins for the Home Workshop
-
Affordable Metal Printing: Just a few years ago, printing in stainless steel or aluminium was limited to industrial setups. Now, desktop metal printers (e.g. bound-metal filament + debinding/sintering) are filtering down to consumer budgets. This means you could prototype a custom bracket or gate hinge in actual metal, right in your garage.
-
Bio-Resins and Ceramics: For those interested in specialised applications—dental moulds, architectural prototypes or even home pottery—you’ll soon see home-friendly resins and ceramic powders that cure into functional, high-temperature ceramics.
5. Increased Community Collaboration
-
Open-Source Design Libraries: Websites like Thingiverse and Printables already host thousands of free designs. In the near future, expect more collaborative platforms where you can “fork” a design, tweak it, test it, and then merge improvement suggestions back into the main project—mimicking software-style version control for hardware.
-
Local Maker Hubs and Co-Op Labs: Community workshops equipped with industrial-grade printers, laser cutters and electronics benches are popping up in towns across the UK. These spaces foster knowledge exchange, and you can access high-end equipment without the full capital investment.
As these trends converge—richer materials, smarter software, metal and ceramic capabilities, plus vibrant maker communities—the barrier to creating professional-quality prototypes at home will all but vanish. For DIYers, this future promises not only more powerful tools but a mindset shift: no longer constrained by “I wish I had that tool,” but rather, “What can I imagine next?”
Conclusions
Integrating 3D printing into your DIY repertoire is more than a fancy upgrade; it’s a paradigm shift. By embracing additive manufacturing, you unlock:
-
Creative Freedom: There are no limits—if you can dream it up, you can print it.
-
Resource Efficiency: Less waste, shorter lead times and lower costs compared with traditional methods.
-
Continuous Improvement: Rapid iteration cycles let you learn, adapt and refine until your design is truly fit for purpose.
Whether you’re a beginner sketching your first CAD model or an experienced maker fine-tuning functional parts, the principles remain the same: understand the technology, choose the right materials, gather honest feedback and iterate relentlessly. The next time you tackle a DIY challenge, consider how a quick 3D-printed prototype might save you hours—or even days—of trial and error.