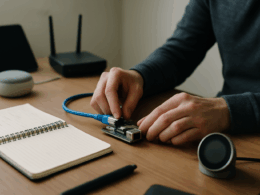
Pre-wiring motorised blinds while a property is open is the sensible move. It costs a little time now and saves upheaval later. I favour a practical, layered approach: run data, run power, leave spare cores, and label everything. Below I use a project-kickoff checklist so you can treat pre-wiring like any other small retrofit project.
1) Define goals and success metrics
Be explicit about what you want the wiring to enable. Do you want simple scheduled open/close routines, voice control, integration into a smart home hub, or full building automation? My baseline metric is two things: the blinds can be powered reliably, and they can be controlled by a networked controller later without redoing walls.
Concrete targets I use: one Cat6a to each blind location for data/PoE-capable devices, one power run (16/2 or 16/4 depending on motors) routed to a neat junction box, 1 m coil of spare cable at each end, and labelled terminations at a central plate. If voice control or scheduled automation matters, ensure the route goes back to the comms cupboard or hub location.
2) Identify stakeholders and roles
Name the people who touch the cables. I always put an electrician on the “power” side and a cabling person or DIYer on the “data” side. The electrician decides mains vs low-voltage runs and compliance. The cabling person handles Cat6a, cable routing and patching into the network switch. If an installer will fit the blinds later, involve them early so their motor and control preferences dictate the wiring choices.
Assign a single decision-maker for trade-offs. That avoids endless changes. If you are doing the work, accept responsibility for labelling, testing and handing over clear documentation.
3) Create timeline and milestones
Tie the wiring work to clear build milestones. My timeline looks like this:
- Rough-in during demolition or first fix.
- Cable pulls and labelling on second fix.
- Electrical sign-off before plastering where mains are concerned.
- Data termination and testing once walls are closed.
Milestones: cables pulled, cores coiled and labelled, junction boxes installed, electrician sign-off, Cat6a patched into switch. Keep tasks short and test at each milestone. A failed cable test at final snagging is a nuisance that slows installers.
4) Assign tasks and resources
Split tasks by skill. Typical allocation:
- Electrician: mains provisioning, final connections, consumer unit space.
- Cabler: Cat6a runs, patch panel labels, continuity testing.
- Builder/plasterer: protect conduits, leave access panels.
- You: make the decisions, keep a simple spreadsheet of cable IDs and locations.
Materials I always order in advance: Cat6a bulk, spare 16/2 and 16/4 runs, blank wall plates, modular back boxes, and a box of cable labels. Buy a cheap cable tester. If you expect to use PoE for controllers, get a PoE-capable switch with spare ports.
5) Risk assessment and mitigation
The main risks are: running the wrong type of cable, insufficient power capacity, and poor access when blinds are fitted. Mitigate like this:
- Run both types: data (Cat6a) plus a power run. That covers most future scenarios.
- Use 16/4 instead of 16/2 where you expect more complex control or dual-motor heads. It gives two extra conductors for separate feeds or sensors.
- Protect cables with conduit and leave accessible junction boxes. A small chase or conduit saves dismantling plaster later.
- Label, label, label. Mark both ends with a durable ID and note in the wiring spreadsheet.
If mains work is needed, book an electrician early. Don’t guess on cable rating or breaker sizes.
6) Communication plan
Keep one channel for decisions. I prefer a single short shared document and a short weekly check-in. Put the cable map and a simple diagram in the document. Share these with the electrician and the installer who will put on the blinds later.
At handover, provide: a picture of exposed routing, the cable spreadsheet, and a list of terminated ports in the comms cupboard. If anything is changed on site, update the document immediately. Clear, concise changes avoid expensive rework.
7) Review and approval process
Create a short checklist for sign-off before walls close:
- Cat6a run to each blind verified with continuity and pair tests.
- Power runs verified and marked for intended use (mains or low-voltage).
- Spare cores present and coiled in a junction box or attic space.
- Junction boxes accessible and labelled.
- Electrical work certified by the electrician if applicable.
I ask the installer to review the final sign-off list too. That flags compatibility issues early. Keep photos of terminations and test results as part of the acceptance pack.
Practical wiring choices I recommend
- Run at least one Cat6a to each blind location. It gives data, potential PoE and future flexibility.
- Run a power cable as well. If you expect simple motors, a 16/2 run may be enough. If you expect dual motors, separate feeds or additional control lines, go 16/4.
- If you plan no wall switches, run an extra Cat6a or a small control cable so a relay or controller can be fitted later without opening the plaster.
- Leave at least 0.5–1 metre of slack coiled in an accessible void. Terminate neatly in a labelled box.
Final takeaways
Treat pre-wiring as a small project and document decisions. Cat6a plus a sensible power run covers most futures. Use 16/4 where flexibility is valuable. Protect routes, label everything and get an electrician to confirm any mains work. The extra 30 minutes per window now avoids cutting into finished walls later.


